Hello Hello Everyone!!!
I often get asked if I use custom WB and if I do, how do I do it? Well, hopefully this post will offer a little incite into how I get those beautiful tones/colors SOOC (straight out of the camera). Now remember, just like anything to do with photography, there are a million ways to do white balance. This is just my take and what personally works for me 🙂 By taking the extra 5 minutes to set this up prior to my newborn sessions, it saves me TONS of time behind the computer 🙂 I only do custom WB during my newborn sessions where my lighting is consistent and I am not switching the direction of where I am shooting.
So without further ado, here is my workflow for Custom WB 🙂
I start off with getting my background set up. This set up is in my living room and at about a 45* angle to the large window camera right.

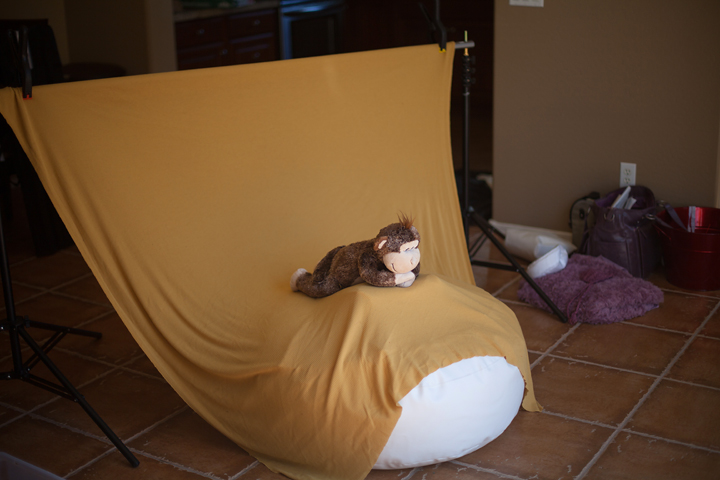
After I have my setup the way I want it, I get my photovision calibration target (purchased off of amazon.com) and place it where my subject will be. I want to shoot this target in the same light that my subject will be in. that will give me the most accurate WB information and color. The image on the right is what i want to capture with my camera. I want to fill the entire frame with the target and try to get equal parts of each color. I do this before I make any changes to my camera (so my camera is still set to AWB).


After I get this image captured I do the following:

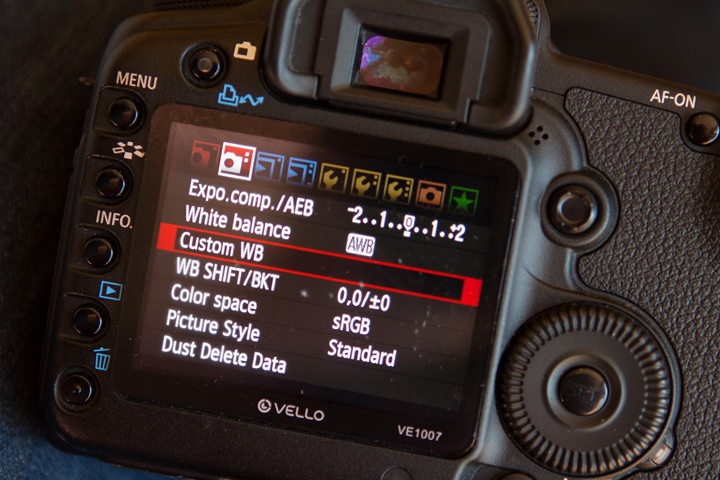
I get into my menu and find the custom WB option and select it.


Then it will ask you to select the image you would like to use. Make sure the image of your target is selected. Then select OK. It will then tell you to set your WB to the custom setting.


then go to the top of the camera and hit your WB button. Then use the wheel on the back of the camera to scroll through your options until you get to the custom WB icon.


then hit set and you are good to start shooting!! Easy Peasy Lemon Squeezy!!! Now, canon tends to be a little warm and I particularly like that. But if you do this setup and expose correctly, your babies skin tones and backdrops should be just about spot on!!


Left is AWB and the right image is after I did the above steps and set my camera to CWB


yellow can be a touch color, but this makes it soooo easy 🙂
It is important to remember that if you change your lighting setup (the location you are shooting at) the WB will most likely change with it. That is why I only do this for my newborns because I am shooting in the same lighting situation the whole session.
Feel free to ask any questions and I hope that this really helps anyone who has had problems with this!!! AND in case you were wondering, I am using my STUDIO BABY posing bag, traveler size and the new butterfly positioner to position my subjects 🙂 They are WONDERFUL products and I HIGHLY HIGHLY recommend them!!! Be sure to check out her FB as well to stay updated on sales and discounts and tell her I said hi! 🙂


.jpg)
Haidi Edwards - Great tutorial, thank you! I love your model. He’s cute! 🙂
Haidi Edwards - Oh and I LOVE your work, too. 🙂
Wendy - Thank you so much for this little tutorial. I dont shoot newborns at the moment.. but this is great information.
Kelly Reithmeyer - Thank you so much! I have had the hardest time with my new backdrops and its been so upsetting! I am going to test this out tomorrow! Thank you Thank you Thank you!!!